n8n Form trigger#
Use the n8n Form trigger to start a workflow when a user submits a form, taking the input data from the form. The node generates the form web page for you to use.
Build and test workflows#
While building or testing a workflow, use the Test URL. Using a test URL ensures that you can view the incoming data in the editor UI, which is useful for debugging.
There are two ways to test:
- Select Test Step. n8n opens the form. When you submit the form, n8n runs the node, but not the rest of the workflow.
- Select Test Workflow. n8n opens the form. When you submit the form, n8n runs the workflow.
Production workflows#
When your workflow is ready, switch to using the Production URL. You can then activate your workflow, and n8n runs it automatically when a user submits the form.
When working with a production URL, ensure that you have saved and activated the workflow. Data flowing through the Form trigger isn't visible in the editor UI with the production URL.
Node parameters#
These are the main node configuration fields:
Authentication#
- Basic Auth
- None
Using basic auth#
To configure this credential, you'll need:
- The Username you use to access the app or service your HTTP Request is targeting.
- The Password that goes with that username.
Form URLs#
The Form trigger node has two URLs: Test URL and Production URL. n8n displays the URLs at the top of the node panel. Select Test URL or Production URL to toggle which URL n8n displays.
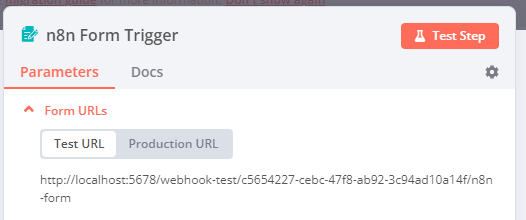
- Test URL: n8n registers a test webhook when you select Test Step or Test Workflow, if the workflow isn't active. When you call the URL, n8n displays the data in the workflow.
- Production URL: n8n registers a production webhook when you activate the workflow. When using the production URL, n8n doesn't display the data in the workflow. You can still view workflow data for a production execution. Select the Executions tab in the workflow, then select the workflow execution you want to view.
Form Path#
Set a custom slug for the form.
Form Title#
Enter the title for your form. n8n displays the Form Title as the webpage title and main h1 title on the form.
Form Description#
Enter the description for your form. n8n displays the Form Description as a subtitle below the main h1 title on the form. Use \n or <br> to add a line break.
Form Fields#
Create the question fields for your form. Select Add Form Field to add a new field.
Every field has the following settings:
- Field Label: Enter the label that appears above the input field.
- Field Type: Choose from Date, Dropdown List, Email, File, Number, Password, Text, or Textarea.
- Select Date to include a date picker in the form. Refer to Date and time with Luxon for more information on formatting dates.
- Select Dropdown List > Add Field Option to add multiple options. By default, the dropdown is single-choice. To make it multiple-choice, turn on Multiple Choice.
- Required Field: Turn on to require users to complete this field on the form.
Respond When#
Choose when n8n sends a response to the form submission. You can respond when:
- Form Is Submitted: Send a response to the user as soon as they submit the form.
- Workflow Finishes: Use this if you want the workflow to complete its execution before you send a response to the user. If the workflow errors, it sends a response to the user telling them there was a problem submitting the form.
- Using 'Respond to Webhook' Node: Use this for the form trigger to respond as defined in the Respond to Webhook node.
Node options#
Select Add Option to view more configuration options:
- Append n8n Attribution: Turn off to hide the Form automated with n8n attribute at the bottom of the form.
- Form Response: Choose how to respond when the user submits the form.
- Respond With > Form Submitted Text: Show a message to the user.
- Respond With > Redirect URL: Send the user to a new page.
- Ignore Bots: Turn on to ignore requests from bots like link previewers and web crawlers.
- Use Workflow Timezone: Turn on to use the timezone in the Workflow settings instead of UTC (default). This affects the value of the
submittedAttimestamp in the node output.
Templates and examples#